
Last Updated: October 23, 2026
Quick Summary
Customizable room design kits are downloadable plans with floor plans, color codes, mood boards, and shopping lists you adjust to fit your space. At SpaceKits, we build each kit from scratch so a first-time decorator follows a proven layout instead of guessing. A kit hands you a tested plan before you spend a dollar on furniture.
- Customize in order: room outline first, then furniture templates, clearances, palette, and finally the shopping list.
- Leave at least 3 feet for main walkways and keep a 30-inch minimum path to every door.
- A 12 x 14 foot living room measures 168 square feet, enough for a full seating group with clear walkways.
- Buy anchor pieces first, then tables, lighting, and decor, checking dimensions against your floor plan.
- For accessibility, use a 36-inch clear path and a 60-inch turning circle in the room's center.
Table of Contents
- Why Customizable Room Design Kits Work for Beginners
- What's Inside a Room Design Kit (and How to Customize It)
- Step 1: Measure Your Room and Build a Floor Plan
- Step 2: Use a Free Online Room Planner to Test Layouts
- Step 3: Lock In Furniture Placement With a Room Layout Planner
- Step 4: Build a Room Design Mood Board Before You Buy
- Step 5: Turn Your Kit Into an Interior Design Shopping List
- Small Rooms, Rentals, and Awkward Layouts: Making a Kit Fit
- Frequently Asked Questions
Why Customizable Room Design Kits Work for Beginners
Customizable room design kits are downloadable plans with floor plans, color codes, mood boards, and shopping lists you adjust to fit your space.
Most beginners stall at the same spot: a sofa that crowds the walkway, or a paint color that clashes with the rug.
Below, we walk through how to use one, from measuring your room to building an interior design shopping list.
What's Inside a Room Design Kit (and How to Customize It)
A customizable room design kit is a physical planning system, not just a PDF. The best kits ship as a printed packet plus a digital companion, every component built to the same scale.
The physical components
- Scaled room grid sheets, pre-printed graph paper where one square equals one foot. Draw your room outline once, and every furniture template after that is sized to match.
- Reusable furniture templates, die-cut or peel-and-stick shapes for sofas, chairs, beds, tables, and rugs at grid scale. Most kits include 40 to 80 pieces, so you can swap a 7-foot sofa for an 84-inch one instantly.
- Room shape overlays, transparent or traceable sheets with common footprints (10 x 12, 12 x 14, 12 x 16) plus blank sheets for odd dimensions.
The digital companion
Most kits include a downloadable file with a clickable shopping list, a mood board, and a digital floor plan for a free planner.
How to customize each part
Customize in this order:
- Start with the room outline. Trace your measured walls onto the grid sheet using the scale ruler. Mark doors with their swing arc and windows with their sill line. This outline is fixed.
- Swap furniture templates before you touch color. If the kit's sofa is too long for your wall, pull a shorter template, you can test three sofa sizes in five minutes.
- Check clearances with the card. Every time you place a piece, run the clearance card against it. If a walkway drops below the minimum, move the piece, do not shrink the walkway.
- Adjust the palette last. Once the layout is locked, compare the swatch book to your room's light. North-facing rooms read cooler, so a warm neutral often beats the kit's original shade. Swap one or two chips, not the whole palette.
- Rebuild the shopping list from your final layout. Cross off kit items you swapped and add the dimensions of what you actually placed, so the list matches the grid sheet.
Adapting a kit to unusual spaces
The templates are the flexible part. For an L-shaped room, split the outline into two rectangles on the grid sheet, plan each zone, then check the seam. For an angled wall, place the largest template against the longest straight wall and let the angle become a corner for a chair or plant. Under 100 square feet, drop the largest template down one size and confirm a 30-inch path to every door.
Our full collection packs 49 templates across 10 rooms and five styles. See the range in the Vol I. Collection.

Step 1: Measure Your Room and Build a Floor Plan
Measure every wall, then note doors, windows, and outlets. Accurate numbers stop you from buying furniture that will not fit.
Grab a tape measure, notebook, and pencil. Work clockwise, recording each wall length and marking fixed features as you go.
Measuring checklist for any room shape
- Length and width of each wall
- Door locations and which way they swing
- Window width, height, and sill position
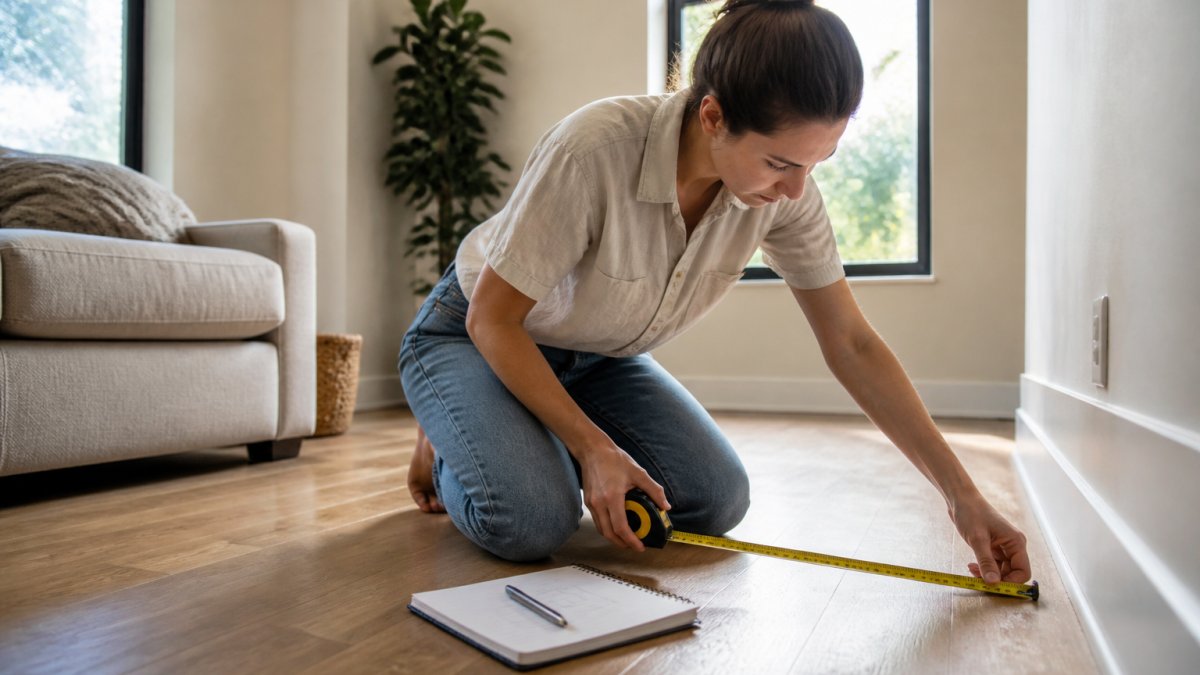
For odd shapes, split the room into rectangles, measure each, and add the areas for your square footage. Then transfer it onto graph paper at scale, one square per foot.
That scaled drawing is your floor plan. Keep it handy, because every later step builds on it.
Step 2: Use a Free Online Room Planner to Test Layouts
A free online room planner lets you drag furniture symbols onto a scaled canvas and see what fits before you move a single piece, the fastest way to test layouts without lifting anything heavy.
Most planners work the same way: enter your room dimensions, then drop in furniture shapes sized to scale.
Digital tools let you test ten layouts in ten minutes. Try these moves first:
- Center the largest piece on the main wall
- Leave at least 3 feet for main walkways
- Pull furniture off the walls to create conversation zones
Many free planners also offer a 2D design view and a 3D design preview. The room planning tools from Real Simple round up several free options worth trying.
Once a layout feels right, save it. You now have a tested plan to compare against your kit.
Step 3: Lock In Furniture Placement With a Room Layout Planner
A room layout planner turns rough ideas into a fixed furniture placement plan. This is where you commit, because a locked layout protects you from impulse buys that wreck the flow.
Compare your tested layout to the one in your kit. If the kit's plan fits your dimensions, use it. If not, adjust the furniture symbols until the spacing works, then write down the final positions.
A worked example: 12 x 14 foot living room
Picture a 12 x 14 foot living room with one window and a door on the short wall. Here is how a kit layout plays out:
Zone |
Placement |
Spacing check |
|---|---|---|
Sofa |
Long wall, centered |
3 ft walkway behind |
Coffee table |
18 in from sofa |
Reachable from both ends |
Accent chairs |
Facing sofa |
4 ft conversation gap |
Media unit |
Opposite sofa |
Clear sightline to TV |
Rug |
Anchors all seating |
Front legs on rug |
The room measures 168 square feet, enough for a full seating group if you keep walkways clear. Every piece has a set position and a spacing rule. That is what a layout planner gives you: numbers, not vibes.
Step 4: Build a Room Design Mood Board Before You Buy
A room design mood board is a collection of images, colors, and textures that defines the look you want.
Start with the palette from your kit.
A cohesive design comes from repetition. Repeat two or three colors and one material across the room.
For guidance on pulling a palette together, the color theory basics from Canva explain how complementary and analogous schemes work.
Step 5: Turn Your Kit Into an Interior Design Shopping List
Your kit's clickable shopping list bridges plan and purchase.
Work through the list zone by zone: seating first, then tables, then lighting, then decor. Buying in that order keeps the room functional even if you furnish it over several months.
A few habits keep the budget in check:
- Buy the anchor pieces first (sofa, bed, dining table)
- Fill gaps with thrift flips and secondhand finds
- Wait on decor until the big pieces arrive
If you are not sure where to start, our Vol I. Collection bundles every room and style into one download.
Small Rooms, Rentals, and Awkward Layouts: Making a Kit Fit
Small rooms, rentals, and odd angles do not break a kit. They change which templates you keep and which you swap. The layout logic still applies; only the pieces and the clearances change. Here is how to adapt a kit to each constraint with numbers you can check.
Small rooms: protect the path first
The beginner mistake in a small room is scaling everything down equally. Instead, protect circulation and shrink selectively.
- Keep a 30-inch minimum path to every door and between facing furniture. Below 30 inches, a room starts to feel like an obstacle course.
- Keep 36 inches for main walkways and any path that carries laundry, groceries, or a pet.
- Shrink the sofa before the coffee table. A 72-inch sofa with an 18-inch-deep coffee table usually works better than an 84-inch sofa with a 12-inch table, because the sofa sets the room's anchor.
On the grid sheet, mark the 30-inch path with a pencil line before you place any furniture. Treat that line as a wall you cannot cross.
Rentals: change what you can take with you
Renters should spend on pieces that move and skip anything permanent.
- Skip paint; use removable wallpaper, large art, and rugs to carry the palette. A single 4 x 6 rug and one large framed print can do most of the color work.
- Choose freestanding storage over built-ins, and anchor tall pieces to the wall with removable straps where the lease allows.
- Measure the door swing and the stairwell before buying a sofa. A piece that fits the room can still fail the hallway.
Awkward layouts: let the angle work
- L-shaped rooms: split the outline into two rectangles on the grid sheet, plan each zone, then check the seam. A rug can visually join the two zones if it spans the seam by at least a foot on each side.
- Angled walls: place the largest template against the longest straight wall and turn the angle into a reading nook, a plant corner, or a desk alcove.
- Long, narrow rooms: create two zones (for example, seating and dining) and leave a clear 36-inch path down the long axis.
Accessibility and mobility
If anyone in the household uses a walker or wheelchair, the numbers change. A common guideline is a 36-inch clear path and a 60-inch turning circle in the room's center. Doorways are often the bottleneck, measure the clear opening, not the door slab. Keep the heaviest pieces clear of the turning circle, and leave one side of a bed or sofa open for transfer.
Test before you buy
Run the adapted plan through a free online planner using your real dimensions, then confirm each piece against the clearance card. If a template will not fit, swap it on the grid sheet before you shop, not after the delivery truck leaves.
The FTC's guidance on home improvement and decorating claims is a useful reminder to check return policies before you buy big pieces online.
Frequently Asked Questions
Can I design my own room online for free?
Yes. Free online room planners let you draw a floor plan, drop in furniture, and test layouts before spending money. Use the free tool to confirm dimensions and traffic flow, then bring in a customizable room design kit for the styling, color palette, and shopping list. Starting with a free planner keeps your budget for the pieces you actually keep. A kit like SpaceKits' Vol I. Collection at $299 covers 49 templates across 10 rooms if you want a full design starting point.
How do I customize a room layout to fit my existing furniture?
Measure each piece you already own (width, depth, height) and mark it on your floor plan at scale. In a room layout planner, move those scaled pieces first, then place new items around them. Keep at least 30 to 36 inches of walking clearance in main paths and 18 inches between a sofa and coffee table. If a kit's suggested layout conflicts with your furniture, swap the piece rather than forcing the fit.
What should a beginner include in a room design plan?
A workable plan includes measured room dimensions, a scaled floor plan, a furniture placement map, a color palette with paint codes, a room design mood board, and an interior design shopping list with links and prices. Add a budget column and a list of items you already own. SpaceKits templates bundle the floor plan, color codes, mood board, and clickable shopping list in one download, which saves beginners from building each piece separately.
What is the actual cost of using a design kit?
The kit price is only part of the total. Add the furniture and decor on the shopping list, which the kit usually splits into budget, mid, and investment tiers. A living room refresh might run a few hundred dollars at the budget tier and several thousand at the investment tier. SpaceKits' full Vol I. Collection is $299 for 49 templates across 10 rooms, so the per-room cost drops sharply if you plan more than one space.
Furnishing a home from scratch is stressful when every choice feels permanent. SpaceKits takes the guesswork out by giving you licensed-designer templates with floor plans, color codes, mood boards, and clickable shopping lists you can customize to your space. Download a kit, follow the five steps above, and shop with confidence. Explore SpaceKits and turn your empty room into a plan you can actually live in.
