
Last Updated: October 25, 2026
Quick Summary
To design small apartment layouts that work, measure every wall and map your circulation first, keeping a 36-inch main walkway and 24-inch secondary paths. Then build a to-scale 2D floor plan, create distinct zones for sleeping, working, eating and relaxing, and validate the arrangement in 3D before buying furniture.
- Measure usable floor space by subtracting doorways and closets from total square footage.
- Leave 18 inches between a sofa and coffee table and 36 inches in front of any door.
- Size each zone with its furniture footprint plus required clearance before adding dividers.
- Rank dividers by reversibility, starting with area rugs and freestanding shelving for renters.
- Keep window treatments off the glass and hang curtains high and wide to enlarge windows.
Table of Contents
- Step 1: Measure Your Apartment and Map the Circulation
- Step 2: Build a 2D Floor Plan Before You Move Anything
- Step 3: Create Zones in an Open-Plan Space
- Step 4: Plan Small Apartment Furniture Arrangement Around Clearances
- Step 5: Choose an Apartment Layout Planner and Validate It in 3D
- Step 6: Studio Apartment Floor Plans That Separate Sleep, Work, and Living
- Step 7: How to Make a Small Room Look Bigger With Light, Height, and Color
- Download a Designer Layout and Adjust It to Your Space
- Frequently Asked Questions
Step 1: Measure Your Apartment and Map the Circulation
Good small apartment layouts start with a tape measure, not a mood board.
Log wall lengths on a sketch, noting door swings, window orientation, and outlets, then map your walkways.
Aim for these clearances:
- Main walkway: 36 inches wide
- Secondary paths between furniture: 24 inches
- Space to pull out a chair: 30 inches
Watch out: measuring to the baseboard instead of the wall throws off every dimension that follows.
If you want a more detailed walkthrough on taking accurate room dimensions before you map circulation, read our guide on how to measure a room for furniture.
These are the clearances to plan for before you place a single piece of furniture.
| Clearance | Width |
|---|---|
| Main walkway | 36 inches wide |
| Secondary paths between furniture | 24 inches |
| Space to pull out a chair | 30 inches |
| Space to open a drawer or cabinet | 24 inches |
Step 2: Build a 2D Floor Plan Before You Move Anything
A 2D floor plan is a flat, top-down drawing showing walls, doors, windows, and furniture footprints, the cheapest mistake-catcher you will ever use.
Draw it to scale or use a free online tool.
You will spot problems fast: the sofa won't fit through the bedroom door, the desk blocks the only outlet.
Keep the plan near you; every layout decision gets tested against it.
Step 3: Create Zones in an Open-Plan Space
Zoning is how you make one room behave like three. In an open-plan studio or small apartment, group furniture into distinct areas for sleeping, working, eating, and relaxing, sized so each zone actually works.
Your brain reads furniture clusters as rooms: a rug under a sofa and two chairs says "living room" without a wall. But a zone too small for its job becomes a traffic jam, so use the Step 1 clearances as your zone budget.
Size each zone before you place a single divider
Start with the furniture footprint plus its required clearance, then add the divider. Working minimums most practitioners use:
- Sleep zone: bed footprint plus 24 inches on the access side (30 inches if two people share the bed). A queen is 60 by 80 inches, so plan roughly 84 by 104 inches of floor for the bed and its walkway.
- Living zone: sofa plus coffee table plus 18 inches between them, and 36 inches of main walkway behind or beside the seating. A two-seat sofa with a slim coffee table typically needs about 8 by 10 feet to feel like a room.
- Work zone: desk depth (24-30 inches) plus 30 inches of chair pull-out plus 24 inches of side clearance for a drawer or filing cabinet.
Add those numbers up. If the total exceeds your usable floor space from Step 1, you have a furniture-scale problem, not a zoning problem.
Match the zone plan to who lives there
Generic studio inspiration assumes one person. Real households need different priorities:
- Solo resident: sleep and work can share the same wall if the desk faces away from the bed. Prioritize one generous living zone over three cramped ones.
- Couple: two distinct work zones (even if one is a fold-down desk) and a sleep zone with 30-inch access on both sides. Shared storage at the zone boundary prevents clutter migration.
- Roommates: each bedroom needs its own door and lockable storage; shared zones (kitchen, living) stay on the main circulation path so no one walks through someone else's sleep zone.
Choose dividers by how reversible they are
For renters, every divider should be reversible, no drilling, no drywall, no landlord call. Ranked from least to most permanent:
- Area rugs, define floor space with zero installation. A rug that stops short of the walkway keeps the path visually open.
- Freestanding shelving, a 12- to 14-inch-deep unit works as a room divider and adds storage on both sides. Anchor it to the wall if taller than about 4 feet.
- Sofa placed perpendicular to a wall, splits a long room without buying anything new.
- Curtains or a folding screen, best for sleep alcoves; choose a ceiling-mounted track only if your lease allows it, otherwise use a tension rod or freestanding frame.
- Lighting changes, a floor lamp or pendant marks a zone without occupying floor space.
Each zone needs its own light and storage: without storage it becomes a dumping ground, and without light it reads as a corridor.
For renters weighing which changes are safe to make, our guide on renter-friendly apartment upgrades covers lease-safe zoning and storage moves.
Step 4: Plan Small Apartment Furniture Arrangement Around Clearances
Small apartment furniture arrangement works when you plan around walking paths first and furniture second.
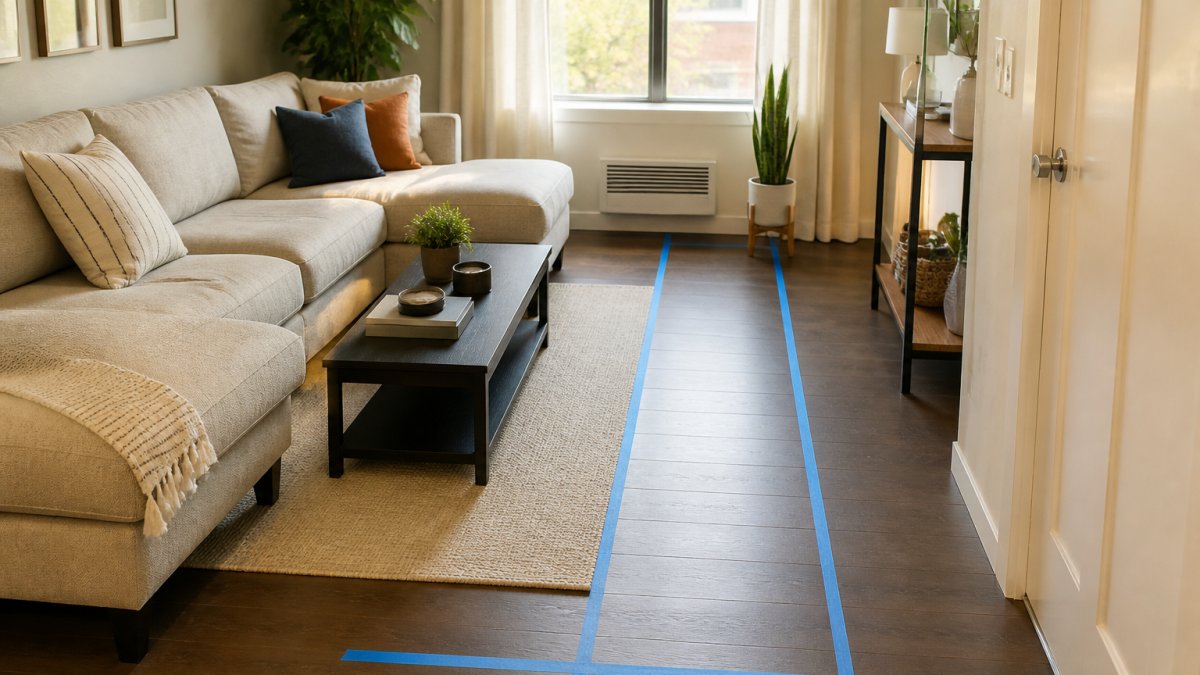
Start with circulation: mark the path from the front door to the kitchen, bathroom, and bedroom.
Then follow these rules:
- Keep at least 18 inches between a sofa and coffee table
- Leave 36 inches in front of any door
- Pull furniture slightly off the walls to make a room feel wider
Multifunctional furniture earns its keep here: a storage ottoman, sofa bed, or drop-leaf table does two jobs in one footprint.
A common mistake is buying furniture that fits the wall but not the walkway.
Step 5: Choose an Apartment Layout Planner and Validate It in 3D
An apartment layout planner lets you drag furniture into a to-scale room and see the result before you buy.
Test two or three arrangements. Check that windows stay unblocked, tall pieces don't crowd low ceilings, and the room still reads as open from the doorway.
If you want app options before you commit, our roundup of the best interior design apps for homeowners covers planners that handle odd angles and tight spaces well.
Validate in 3D, then measure once more in real life with painter's tape on the floor. If the tape path feels tight, the furniture will too.
Step 6: Studio Apartment Floor Plans That Separate Sleep, Work, and Living
Studio apartment floor plans succeed or fail on one question: can you separate sleep from everything else? Each plan below lists the clearances it depends on, the household it suits, and the rental-friendly way to build it.
Plan A: The back-corner sleep zone
Put the bed in the farthest corner from the entry, then build living space in front of it. A shelving unit at the foot of the bed acts as a soft wall.
- Clearances it needs: 24 inches on the access side of the bed (30 inches for a couple), 36 inches for the main walkway past the foot of the bed, and 18 inches between the sofa and coffee table in the living zone.
- Best for: solo residents and couples in a rectangular studio.
- Rental-friendly build: freestanding shelving anchored to the wall, an area rug to mark the living zone, and a floor lamp at the boundary. No construction.
Plan B: The alcove conversion
If your studio has a nook or closet with depth, turn it into a sleep alcove. Curtains close it off at night.
- Clearances it needs: the alcove must fit the bed plus 24 inches of access on at least one long side; the opening should be at least 36 inches wide so you are not squeezing past the frame.
- Best for: remote workers who need the main room to read as an office and living space during the day.
- Rental-friendly build: a tension rod or freestanding curtain frame across the opening; a wall bed is only an option if the lease allows installation.
Plan C: The Murphy or sofa-bed pivot
For very small studios, a wall bed frees the entire floor during the day. Pair it with a desk that doubles as a dining table.
- Clearances it needs: the bed needs its full footprint plus 24 inches of pull-out space in front of it; the desk needs 30 inches of chair pull-out and 24 inches of side clearance.
- Best for: solo residents in studios under roughly 400 square feet who host occasionally.
- Rental-friendly build: a freestanding Murphy-style cabinet bed or a high-quality sofa bed avoids wall installation; confirm the lease before mounting anything.
Choose the plan by household, not by aesthetic
- Solo resident: Plan A or C. Keep work and sleep apart, a desk at the foot of your bed makes it hard to switch off.
- Couple: Plan A with 30-inch access on both sides of the bed. Plan C rarely works for two people nightly.
- Roommates in a studio: treat the sleep zone as private and the living zone as shared; a lockable storage cabinet at the boundary prevents friction.
Make any of these plans accessible and adaptable
A layout that works today should still work if your needs change. Build in these minimums:
- Step-free routes: keep the main path from entry to bathroom at 36 inches with no thresholds or rugs that curl at the edge.
- Turning space: leave a 60-inch-diameter clear circle in the main living zone so a wheelchair or walker can turn.
- Reach ranges: put daily-use storage between about 15 and 48 inches off the floor; reserve high shelves for seasonal items.
For a repeatable way to test these plans in 3D before you commit, revisit Step 5 and our roundup of the best interior design apps for homeowners.
Step 7: How to Make a Small Room Look Bigger With Light, Height, and Color
How to make a small room look bigger comes down to three levers: light, height, and color. None require knocking down a wall.
Light. Keep window treatments off the glass. Hang curtains high and wide so the window reads larger.
Color. Use light, warm neutrals on big surfaces and save bold color for accents.
Mirrors help too. Place one opposite a window to double the natural light.
For a deeper set of tricks, read our full guide on how to make a small room look bigger.
Download a Designer Layout and Adjust It to Your Space
Not everyone wants to start from a blank floor plan. A downloadable template saves hours if you'd rather begin with a professional layout and tweak it.
SpaceKits offers ready-made room templates by licensed interior designers.
Two good starting points for small apartments:
- The Japandi Living Room | Ma Negative Space kit ($22) leans on open space and calm, low furniture, which suits compact rooms.
- The 21st C. Modern Living Room | Minimal Haven kit ($18) uses warm neutrals and intentional placement to keep a room feeling open.
If you want options across every room, the Vol I. Collection ($299) bundles 49 templates across 10 rooms and five design styles, with a commercial license included.
For renter-friendly, adjustable plans, our customizable room design kits for beginners guide explains how to adapt a template to odd angles and low ceilings. If you prefer a template built for styling, browse our interior design templates for home styling.
Frequently Asked Questions
What is a good layout for a small apartment?
Start with circulation, not furniture. Keep one clear walkway of at least 36 inches between doorways and the main seating area, then push seating against walls or float it to define zones. In a studio, split sleep and living with a sofa back or a low bookshelf rather than a full wall. A 2D floor plan drawn to scale shows what fits before you buy anything, and a downloadable template gives you a tested starting point you can adjust to your own measurements.
How do I arrange furniture in a small apartment?
Small apartment furniture arrangement works best when you anchor the largest piece first. Place the sofa or bed on the longest unbroken wall, leave 14 to 18 inches between the sofa and coffee table, and keep 30 to 36 inches clear on the sides you walk past. Choose dual-purpose pieces such as a storage ottoman or a desk that folds into a console. Draw the arrangement to scale on a floor plan before moving anything, so you catch a blocked doorway or a sofa that will not clear the hallway.
Is there an app to design an apartment layout?
Yes, several apartment layout planner tools let you draw walls, drop in furniture at real dimensions, and view the result in 3D. Free options exist, and paid plans usually add a larger furniture library and export features. Whatever tool you use, enter your actual room measurements first, because a plan built on guessed dimensions will not translate to your apartment. A designer-made template plus a planner app is the fastest combination: the template supplies a proven arrangement, and the app confirms it fits your walls.
How can I make a small apartment feel bigger?
Three moves do most of the work: light, height, and fewer but larger pieces. Keep window areas clear and use mirrors opposite the main light source. Hang curtains close to the ceiling and choose low-profile furniture so more wall stays visible. A consistent light color palette from floor to ceiling removes visual breaks. Clutter is the biggest space killer, so plan closed storage before you plan decor. A layout that keeps sightlines open from the entry to the far window will read as larger than the square footage suggests.
Designing small apartment layouts is not about buying less. It is about measuring first, zoning with intent, and testing every arrangement before you spend a dollar. SpaceKits gives you a licensed designer's floor plan, color codes, and shopping links in one instant download, so you can skip the guesswork and start with a layout that already works. Get started with SpaceKits and turn your measurements into a plan you can actually live in.
